Using your own domain
Point a domain you already own at your app, with an SSL certificate issued automatically.
Every published app is born with an address on *.fabapp.app, and it keeps working after you connect your domain. A custom domain does not replace the platform subdomain, it is added to it.
Before you start
You need three things:
- A paid plan. Free publishes only on the platform subdomain. Starter connects 1 domain, Builder connects 5, and Business and Enterprise have no limit.
- A domain you already registered. Fabapp does not sell domains. If you do not have one yet, register it at your registrar of choice and come back.
- Access to that domain's DNS panel. That is where you will create two records. If someone else registered the domain, that person is the one who does this part.
Step 1: open the Domains tab
In your app's editor, open the Domains tab. It has two parts: your platform subdomain (which you can rename under "Edit URL") and the CUSTOM DOMAINS block, which is where this guide happens.
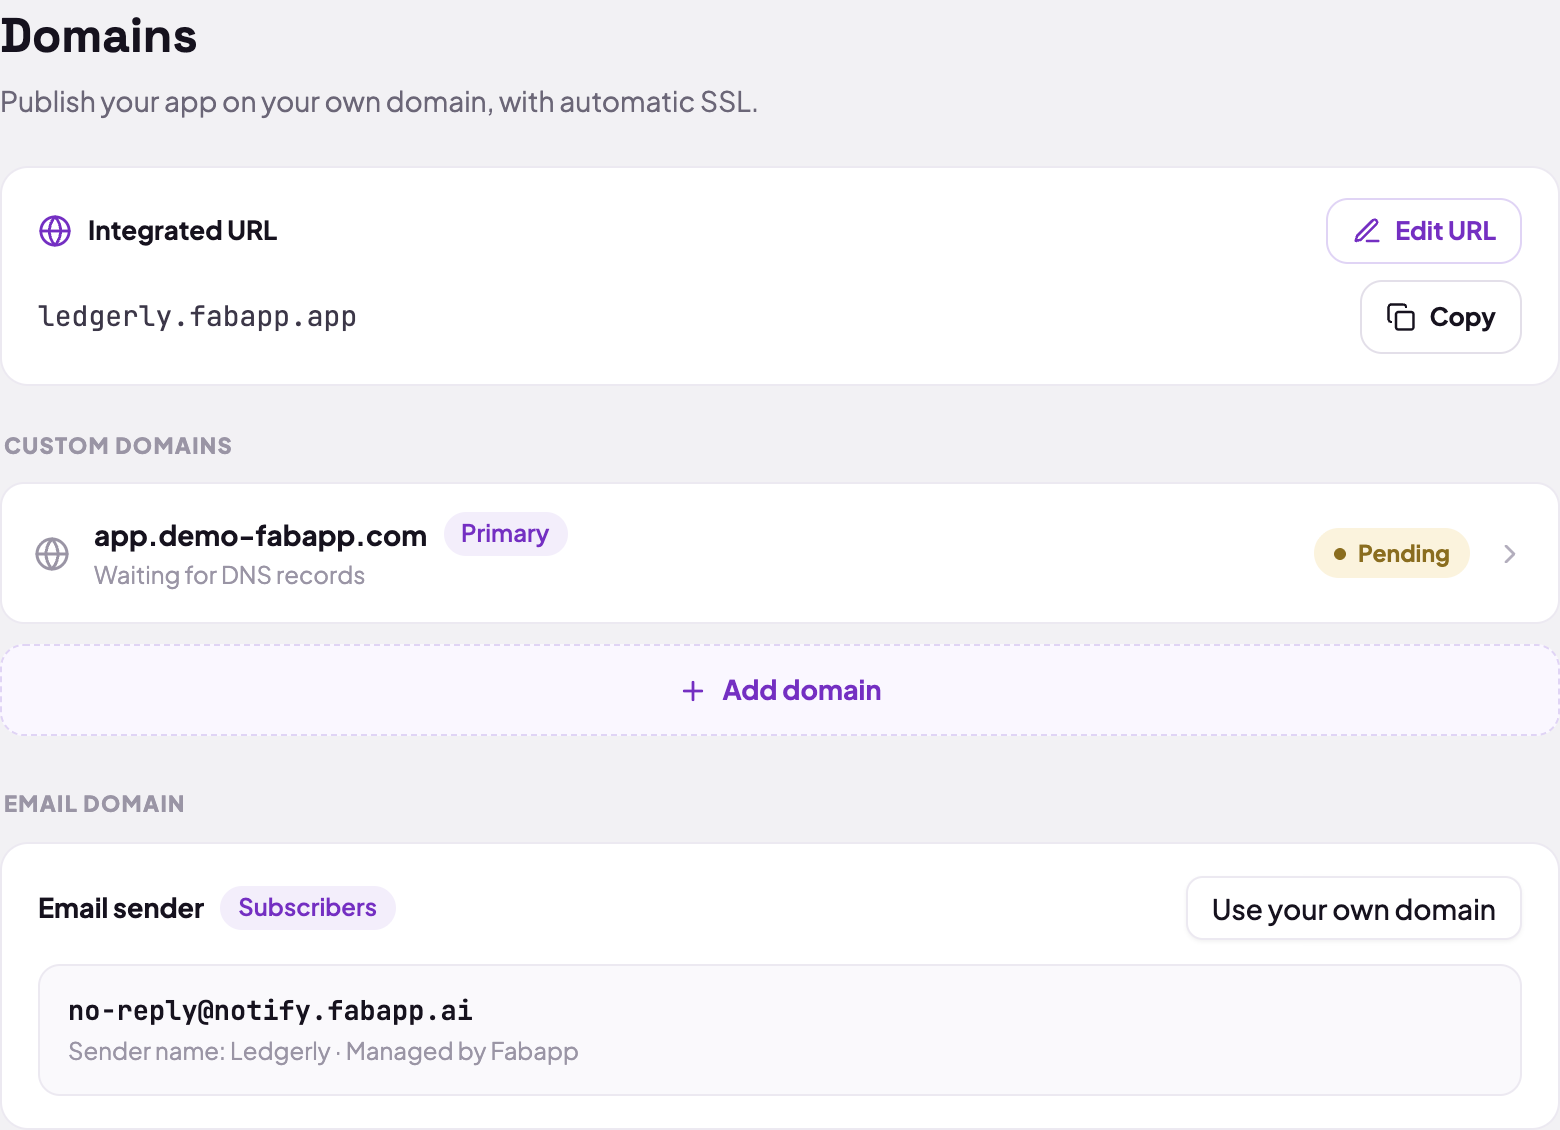
Step 2: choose between a subdomain and the root domain
Before typing, decide which address people will use. The choice changes what your DNS provider needs to be able to do.
- Subdomain (
app.yourcompany.com,www.yourcompany.com): works with every provider, no exceptions. It is the safe option. - Root domain (
yourcompany.com, with nothing in front): the connection is made through a CNAME record, and the DNS standard does not allow a CNAME at the root. It only works if your provider offers ALIAS, ANAME or CNAME flattening. Cloudflare offers it; many simpler providers do not.
If your provider has no ALIAS or equivalent, use www and set up a redirect from the root to www in its panel. It is the most common arrangement on the internet and has no practical downside.
Type the address you chose and click Add domain. You can type it with https:// in front or with a trailing slash; the platform cleans that up.
Step 3: create the records at your provider
The screen opens the DNS Records list, with the Type, Name, Value and Status columns. There are usually two records:
- a CNAME, pointing your domain at Fabapp's address;
- a TXT, proving the domain is yours.
Copy the values from the screen, not from this guide. They are generated for your domain and differ from another app's: the verification TXT in particular is unique and never repeats.
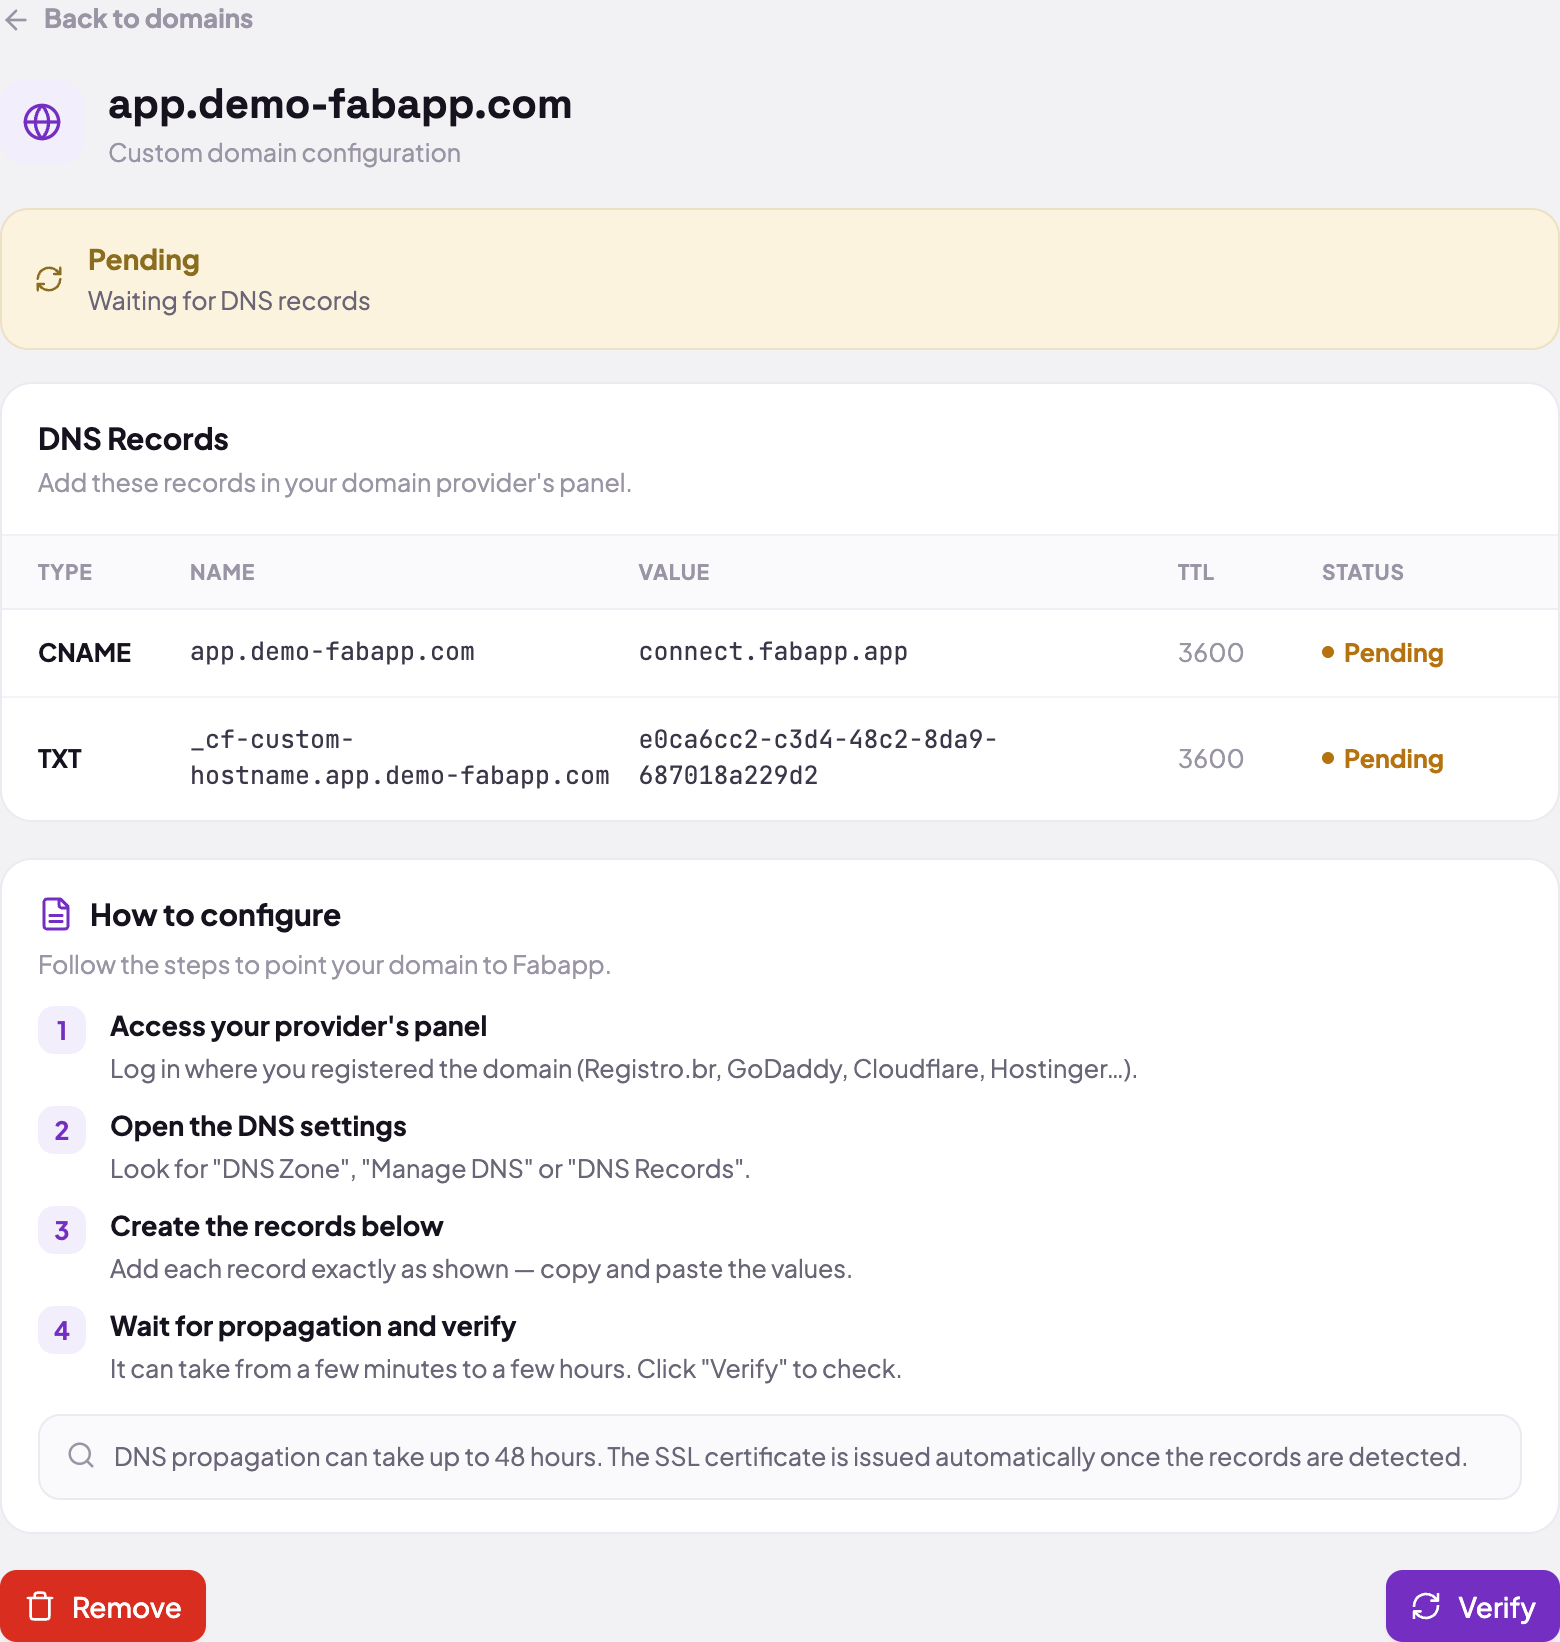
In your provider's panel, look for "DNS zone", "Manage DNS" or "DNS records" and create each record exactly as the table shows. Two details defeat most attempts:
- The Name field. Many providers append the domain for you. If the table says
app.yourcompany.comand the provider's field already shows.yourcompany.combeside it, type onlyapp. Pasting the full name createsapp.yourcompany.com.yourcompany.com, which does not exist. - If your DNS is on Cloudflare, leave the record as "DNS only" (the grey cloud, not the orange one). The certificate is validated over HTTP, and with the proxy on, the validation request stops at your own Cloudflare and never reaches us. Once the status turns Connected, you can switch the proxy on if you want.
Step 4: verify and wait
Go back to the Domains tab and click Verify. The domain goes through three states:
| State on screen | What is happening |
|---|---|
| Waiting for DNS records | we still cannot see your records. Normal in the first minutes |
| Verifying records | we found the records and the SSL certificate is being issued |
| Connected | it is live, with HTTPS |
DNS propagation can take from a few minutes to 48 hours, and almost always takes minutes. You do not have to keep the tab open: come back later and click Verify again. The current state shows in two places, the coloured banner at the top of the domain's screen and the Status column of each record.
Step 5: the primary domain
Every app has a primary domain, and the first one to connect becomes it on its own. If you are only going to use one domain, there is nothing to do in this step.
With more than one connected, you choose: click the domain in the list to open its screen and use Set as primary, next to Verify and Remove. The others stay live and keep serving the app normally. Two rules the screen enforces:
- only a domain already Connected can become primary, and the option refuses while it is pending;
- if you remove the primary one, the oldest of the remaining ones takes its place. The app is never left without a primary.
When it goes wrong
"This domain is already in use". The address is connected to another app, yours or someone else's. Remove it from the old app before adding it to the new one. If you never connected it here, contact support: it may be a leftover from an earlier attempt.
"Invalid domain". A dot is missing or there is a character DNS does not accept. An underscore (_) is not valid, and mysite on its own is not a domain, mysite.com is.
More than an hour in and still "Waiting for DNS records". Almost always one of these three: the record was created with the full name repeated (see step 3), Cloudflare's proxy is on, or the records were created in a different zone, which happens when the domain is registered in one place and points its nameservers at another. Check which panel the nameservers are sending traffic to.
It connected, but the browser shows a certificate warning. The certificate is issued after DNS resolves. If the status already says Connected and the warning persists, force a reload without cache and try a private window: browsers hold on to an old certificate for a while.
The root domain will not connect and the subdomain will. That is the step 2 case: your provider does not support a CNAME at the root. Use www and redirect the root to it.
Next step
With the domain live, the usual next move is sending your app's emails from your own domain, so the password reset message does not arrive from a platform address.